
Overlays are layers that can be placed onto your images to create a certain effect. You might want to make it look as though it is snowing, or switch out a blown out sky for a nice blue one with fluffy clouds. Whatever you are using your overlay for, you will need to be able to add and edit layers in order to use it.
Normally Photoshop is a good tool for this, but if you are using Lightroom, you can still do it to the same level of quality. There’s no way to do it with the standard Lightroom set-up, but thankfully there is a way to use your overlays all the same. You just need the ON1 Photo 10 layers plugin.
We’re going to show you how to use this plugin, so that you can do all of your editing right from Lightroom with no need to go through Photoshop. This is great for streamlining your workflow and will hugely benefit those who don’t like using Photoshop.
Setting your image up
Assuming that you have downloaded and installed the ON1 plugin from their website, we’ll start from simply opening an image. The instructions are all on their website, and you can also try a free trial before you purchase it, so there’s no excuse for not giving this method a try! Get the image you want to use ready, and do all of your other necessary edits so that you are set up to start right from Lightroom.
Now go to the file menu and choose ‘Plug-in Extras’, and head across to the ON1 Layers 10 option in the list that pops up. If you only have one plugin this will be easy to spot, but if you have more, remember to select carefully.
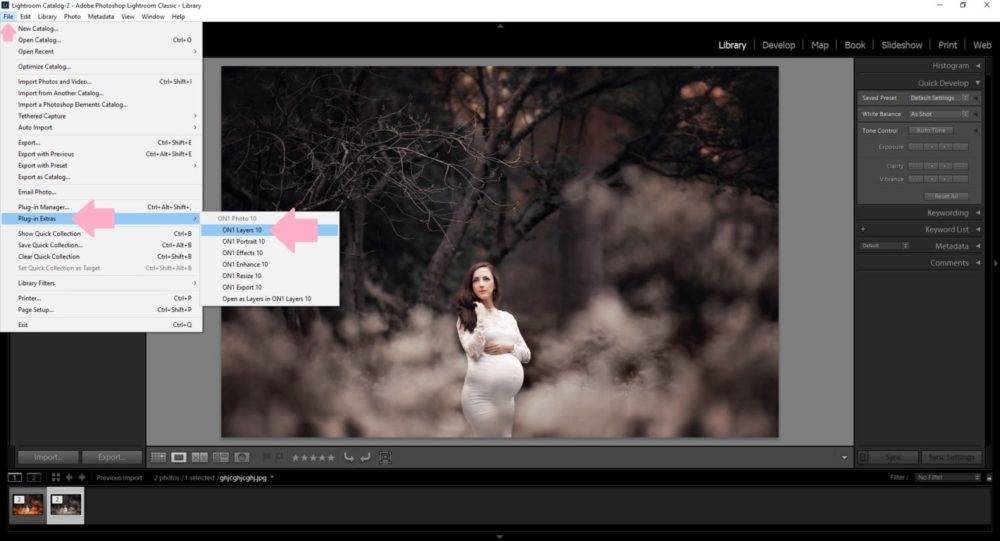
Image is courtesy of Lindsey Lee Photography
This opens up your plugin and you can choose the options as you prefer once it opens. You will then be in a window where you can see the layers in your image as well as options such as changing the opacity. Additionally, you can open the ON1 plugin on it’s own, without going through Lightroom as it also works as a standalone program.
Choosing your overlays
Your overlays will be found in the file menu to the left of your image. Here you will be able to dig around through your folders to find the overlays that you want to use. It’s easier if you put them all into the same place first and keep them organized, so keep that in mind before you start.
When you have found the layers that you want to use, you will see them appearing in the left-hand panel. Select the overlay and click on it, then drag it over to your image and drop it on top.
The default option is to open the overlay as a copy, so go ahead and change that to opening it as a layer instead. This will put your overlay down on top of your image as a new layer that you will be able to move around and edit.
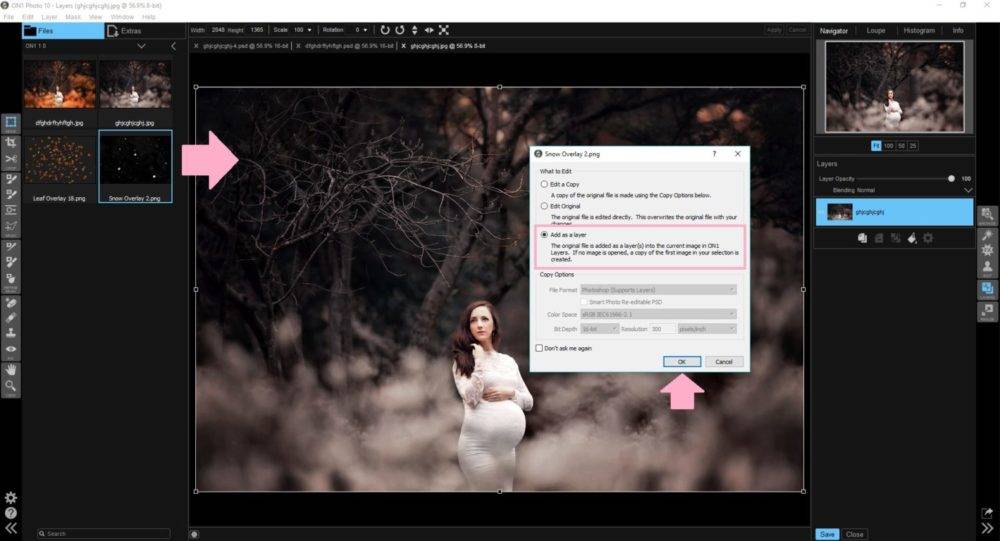
Image is courtesy of Lindsey Lee Photography
You can do this as many times as you like to add more overlays, and you can use the eye toggle button to view or not view your overlay layer as you like.
Place the overlay where you want it and then get ready to edit it how you want it.
Editing your overlay
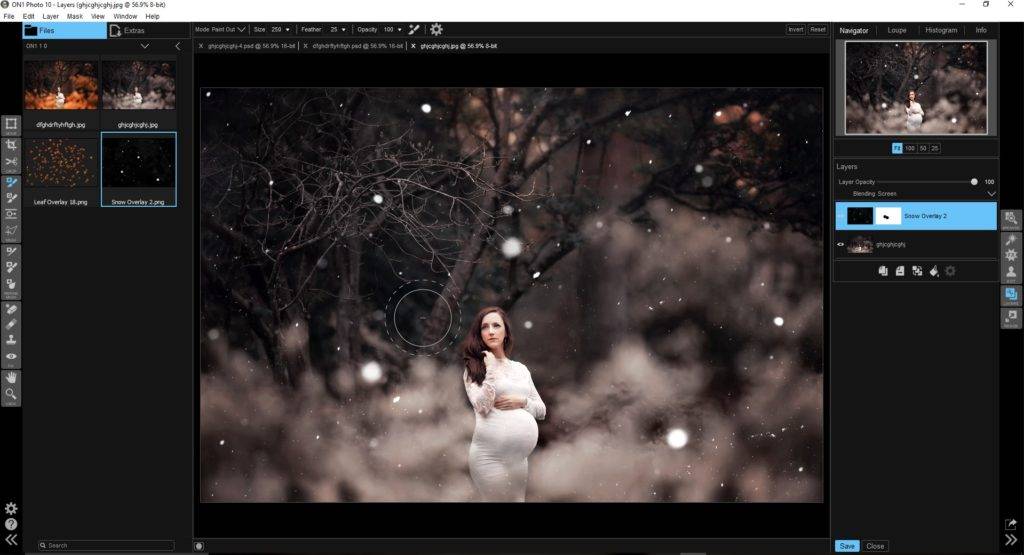
The next thing you need to do is to get your overlay looking the way that you want it to. Select the ‘save’ button at the bottom right of the screen, then click ‘apply’ on the dialogue box that comes up.
Now you can really get started on editing that overlay. Choose the opacity slider to make it appear more or less clearly over the image, blending it in with the original background.
If the overlay appears with a black background that is darkening your image, never fear. This just means that the blending mode isn’t set properly. Luckily, the option to change the blending mode is right there in your layers panel on the right side of the screen.
Most likely, you need to choose the ‘Screen’ blending mode. Click that, and your black background should go away, allowing your overlay to appear the way that it should. This is most common in overlays which contain a transparent background, so there’s no need to panic – it’s just something that happens when using this plugin.
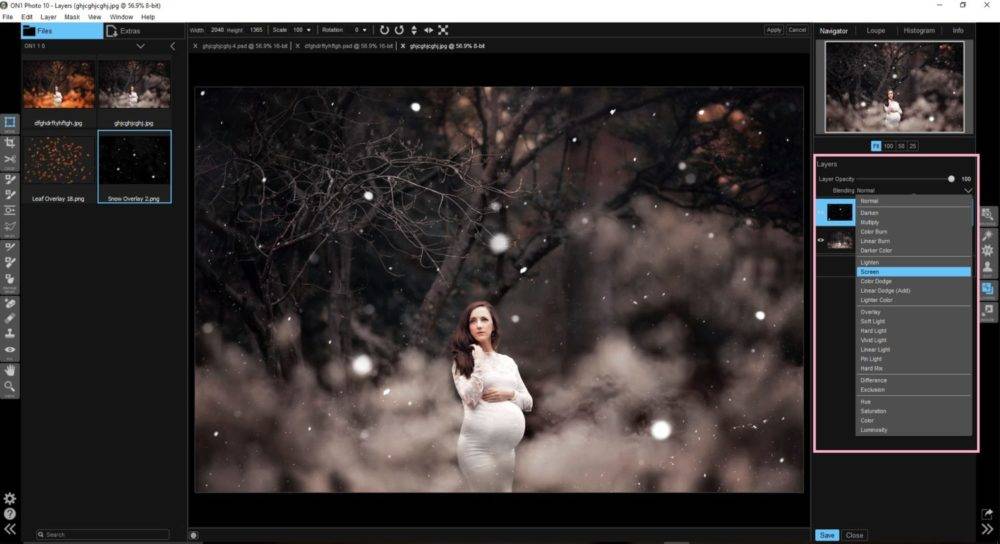
Image is courtesy of Lindsey Lee Photography
Now for the advanced part – at the bottom of the screen is a mask tool button, which looks like a square with a circle inside. Click on this and you can easily remove parts of the overlay from places that they shouldn’t be. This is great for taking snowflakes off faces, helping skies to only appear where the sky should be, and so on.

Image is courtesy of Lindsey Lee Photography
You can adjust the brush you are using at the top of the screen, but the basic idea is to paint over the areas that you want to erase. The good news is that this is non-destructive, so you can put those areas back later if you want to without having to undo all of your other changes.
Saving your changes
Once you’re done with the overlay and satisfied with how it looks, you will want to save it and put it back into Lightroom ready for any further edits you need.
Select ‘save’ at the bottom of the screen, then you will receive a PSD file – the Photoshop format. But the good news is that you can also find the image in Lightroom already.
Go back to Lightroom and look at your list of files. You will find your new image right there!
There are lots of other ways to play around with the ON1 Photo 10 layers plugin and overlays, so you’re not limited to just these techniques.
Now that you’ve read our guide on using overlays in Lightroom, you can also find out more about getting it right by watching Grace Pamela’s video tutorial. This will take you through the stages we have discussed here in a visual way and with some bonus extras too, so watch it now!
Pingback: Summerana’s Multi-Vendor Black Friday-Cyber Monday Photography Giveaway & Sale - Summerana - Photoshop Actions for Photographers
Pingback: Summerana's New Year New Gear Photography Giveaway & Sale - Summerana - Photoshop Actions for Photographers
Pingback: 25K Summerana Tribe Photography Giveaway and Sale - Summerana - Photoshop Actions for Photographers
Pingback: 25Ok Summerana Tribe Images Giveaway and Sale – Summerana – fooshya
Pingback: Summer Camera Giveaway & Sale - Summerana - Photoshop Actions for Photographers
[…] actions, Lightroom and Photoshop video tutorials/editing workshops, 1K+ Photoshop overlays (can also be used in Lightroom if utilizing the ON1 Photo 10 plugin), Photoshop brushes, Lightroom presets, marketing templates, photography logos, and more. You can […]
Thanks for sharing the knowledgeable post.