
THIS IS A GUEST POST COURTESY OF ANGELA SCARANO
Like everything else in Photoshop, there are many ways to do a certain task. To change a color of an item, you can use Hue/Saturation, Replace color, Solid Fill Layer….and it goes on and on.
To be quite honest, I haven’t always found it that easy to change the color, and most often I’ve had to use a combination of the techniques above to get it to work. Sometimes the final result was too “solid” looking or I couldn’t get the look I wanted, but now I’ve started using the Gradient tool. I often only use this ONE method. It gives you that natural look, and it’s quick and easy!
STEP 1:
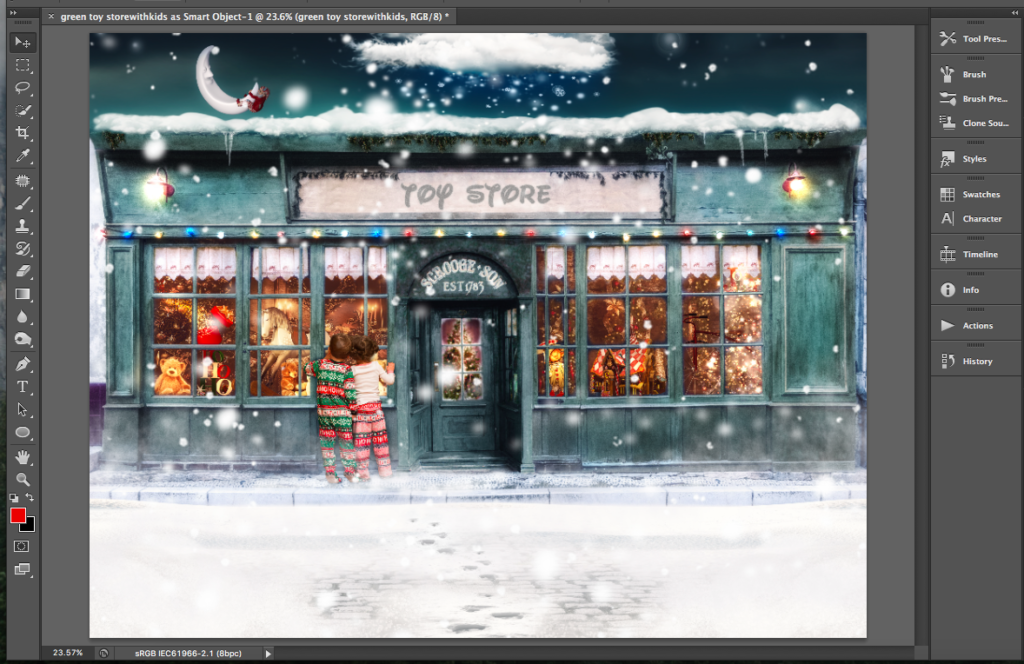
Here is the BEFORE. It’s a winter scene. I want to change it to look like a candy store and maybe use it for Valentine’s Day, so I want to go with pink.
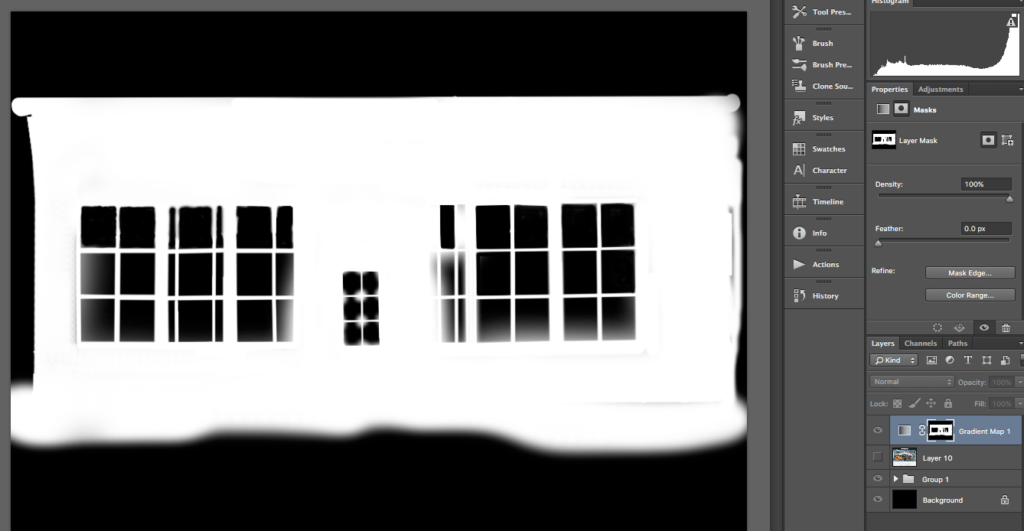
The first step is to select the store. There are various ways to make your selection. Go with your favorite method. I have my own method, as I do lots of product photography, but it’s basically the Quick Selection Tool. Then I clean it up with the Quick Mask mode. Here’s my selection, but remember you can always go in and fine-tune your mask at any point as well.
STEP 2:
With the selection active, click on the “Create New Fill or Adjustment Layer” icon on the bottom right (looks like a half-filled circle).
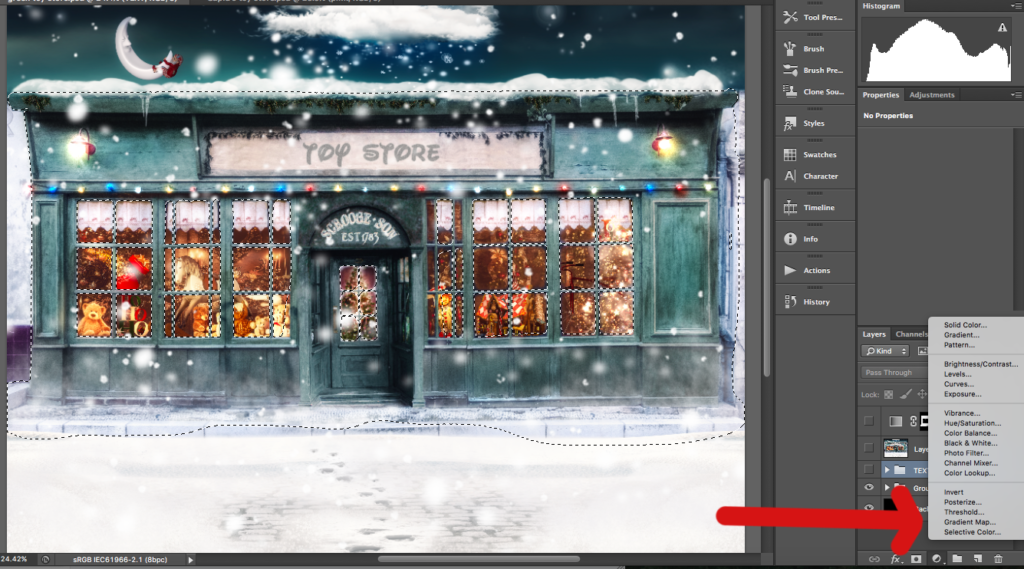
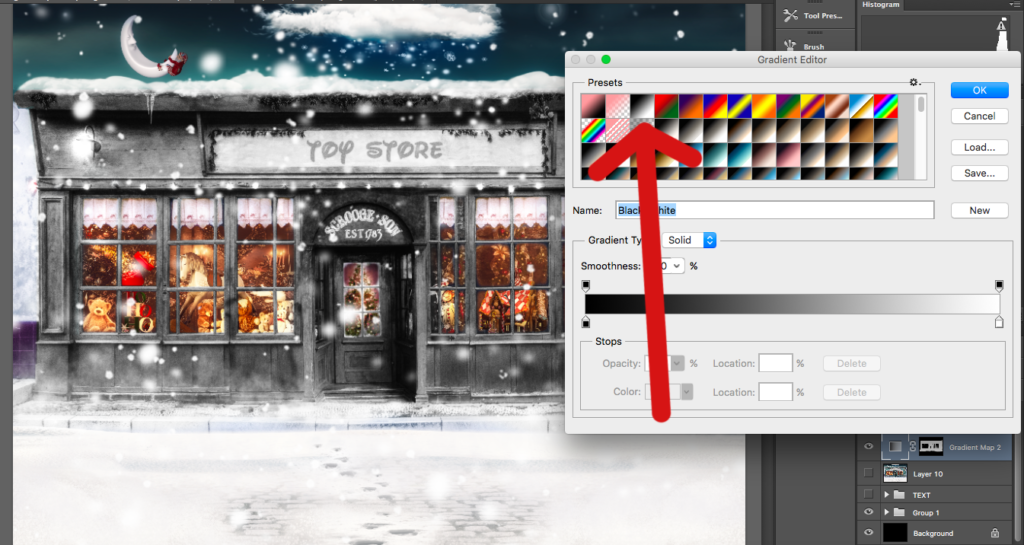
Next select the Gradient Map option. Click on the actual color bar and select the BW square (on my view, it’s the third box). The mask comes up with the store selected as white on the mask. If it didn’t for some reason, click CMD I to reverse the selection on the mask (on a MAC).

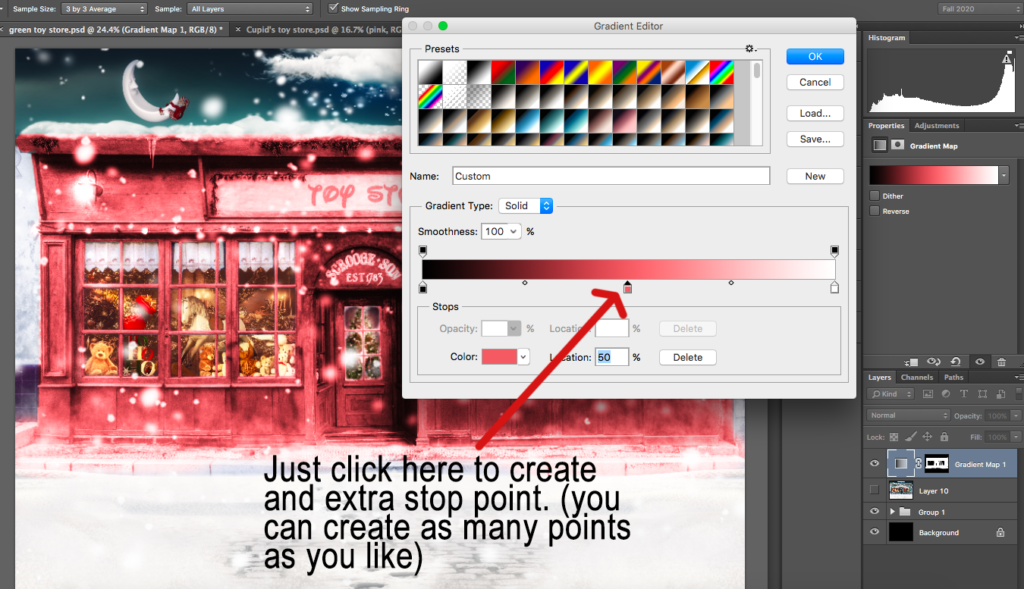
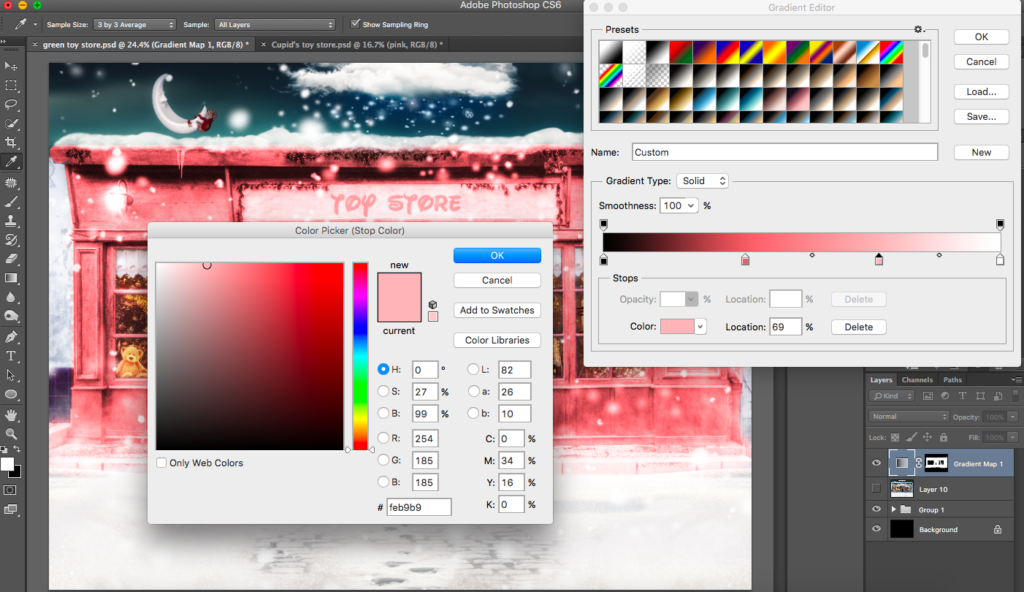
STEP 3:
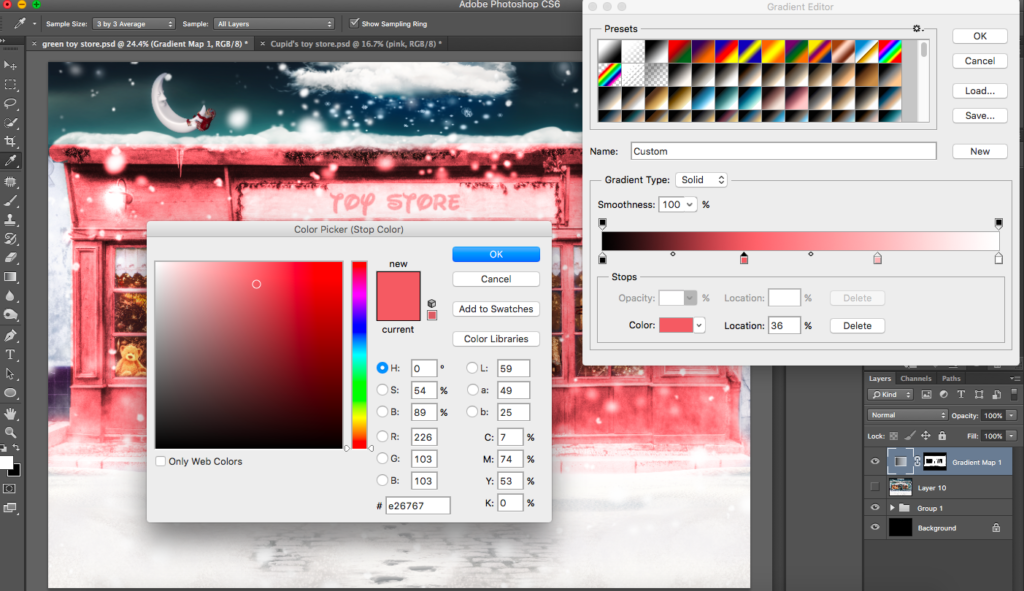
Create an extra point in the center by clicking on it and double-click in the color box. Select the color you want to change it to. Move it to the right to make it darker, or to the left to make the selection lighter. Notice, as you move it to the right, you get more color in the space bar and there is less space towards the furthest white point. This means you have more dark parts in the gradient that will now show up in your selection. The opposite holds true if you move it to the left, where you get more white/light color in the bar. Also notice that I left my furthest points black and white on the ends. I like to have my gradient with black and white on the furthest ends, but you can also change that by clicking on each one and selecting your preferred colors.
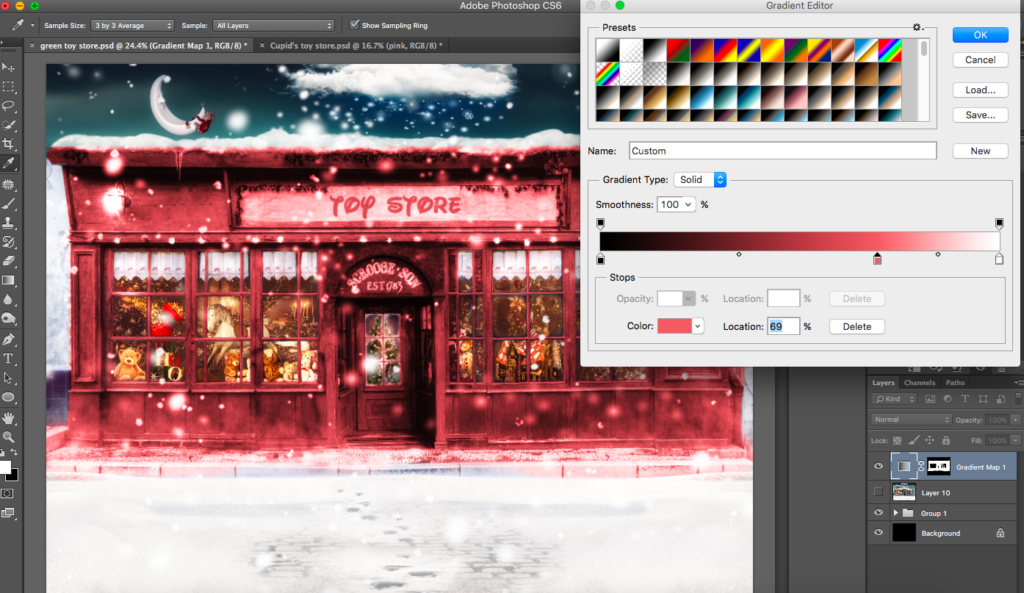
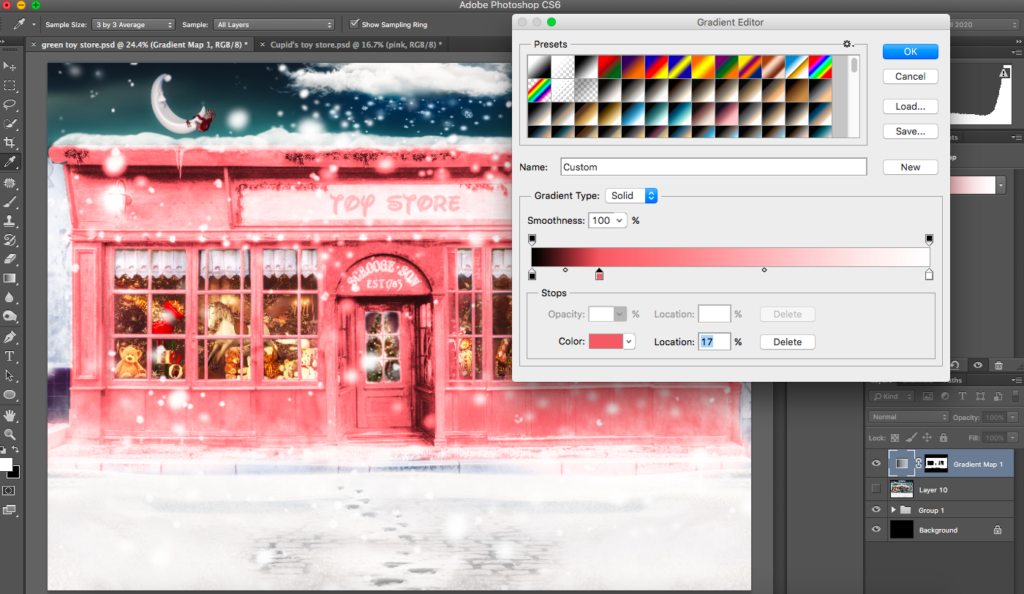
STEP 4:
For this picture, I created two points and did not leave it with just the one in the middle. (Play around…you can create any gradient!) I used a variation of the pink color so that it goes from black to dark pink to a lighter pink and then to white. When I was happy with it, I hit OK. The best part is that it’s a layer, so you can go back in and change it anytime you like! I LOVE THAT!
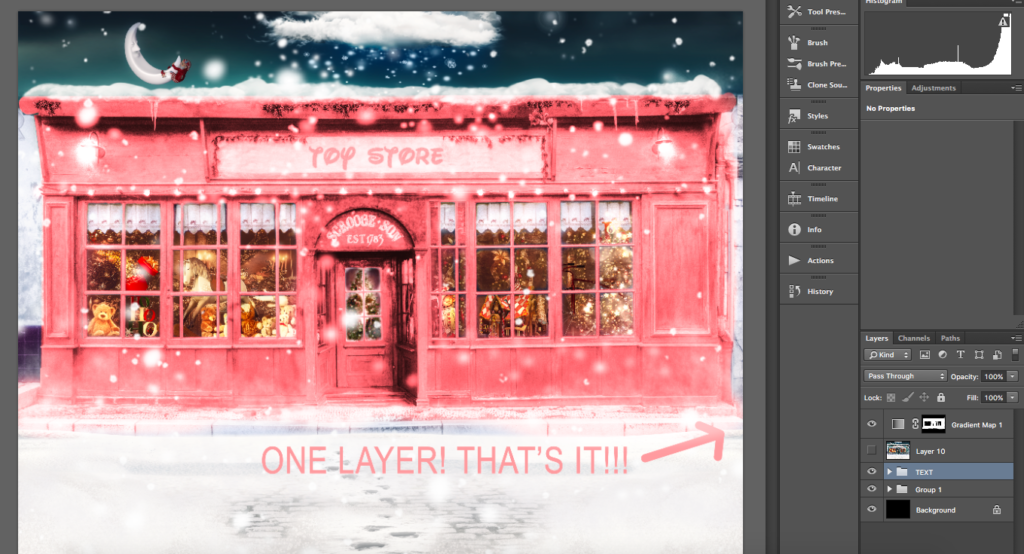
STEP 5:
Here is my layer! I’ve changed the color and it’s all in one layer! What I love about this is that it looks natural and goes from shadows to highlights. It uses the original picture’s shadows and highlights and you don’t have to do anything!
STEP 6:
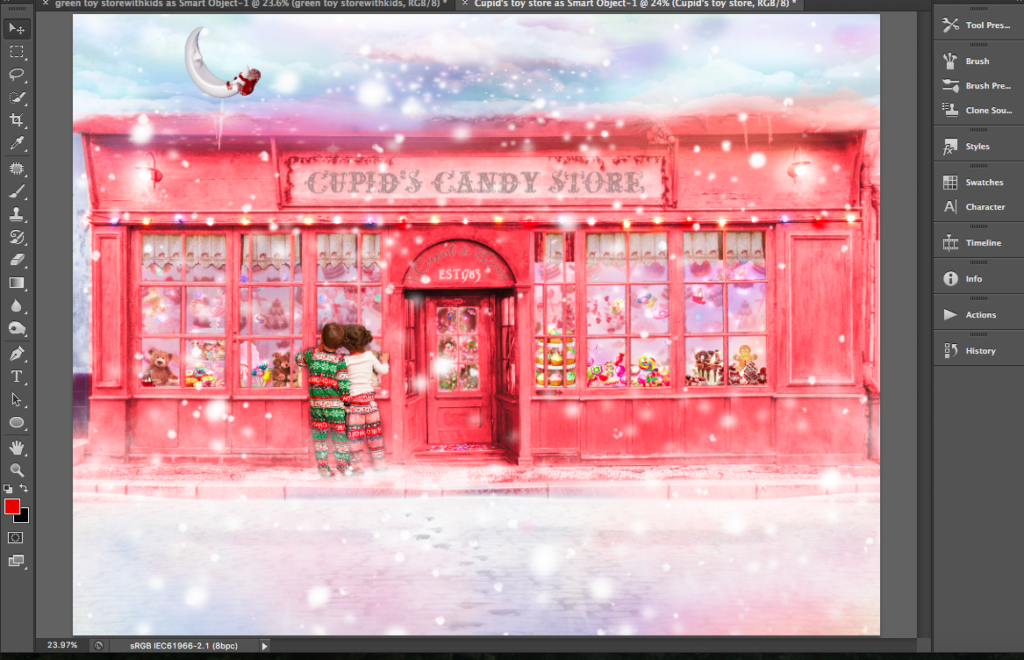
The final picture! Of course I kept editing and changed the window scene, sky, sign, etc. and put the children back in!
Just a little bonus tip: if you are selecting a dress or something without strong lines like this toy store, you can then also try feathering your selection on your mask. To do this, click on the mask and then play with the “feather” slider (under Properties).
Happy Editing!
Not a Summerana Academy member yet? Join by clicking here!
Angela Scarano
https://www.angiescarano.com
You can also find me on Instagram, here: @angie_scarano