
Once you have purchased your new Photoshop brushes, what do you do with them? When you open up Photoshop, you will probably be disappointed to see that they don’t magically appear in your brushes panel. But don’t worry – it is quick and easy to get them installed. Here’s what you need to do.

Download and save your brushes
The first step is to make sure that you have your brushes downloaded and available to use. Summerana has a lot for you to choose from, so there’s bound to be something that catches your eye! Get your download started and save the brush files.
Make sure that it is easy to find your brushes later. One way to do it, for example, would be to create a new folder which is named after the brush you have downloaded. That way, you will know exactly where it is when it comes to doing the next step.
Filing is really important because later on, when you come to download more and more brushes, you might start to get confused about which one is where. Create folders that make sense to you from the beginning, so that you don’t have to do a lot of reorganization later on.
If your files come in a zipped folder, you should also unzip them before you start. This is usually done by right-clicking on the folder and selecting the correct option depending on your operating system.
After your folder is unzipped, you might have some extra files that tell you what to do with the brush or offer extra features. To help you find it, the .abr file is your actual brush.
Move your brush to the Photoshop folder
Next, you will want to put your brush into the correct Photoshop folder. You may be wondering why you don’t just save the brush there in the first place to save some time. Well, there’s actually a reason for that: if you should lose your Photoshop program and need to redownload it because of some problem, your brushes will disappear as well.
If you have them saved in a separate folder first, you have a backup copy that you can always rely on. Right-click on the brush file and copy it, so that you can keep it where it is as well as adding a new version to your Photoshop files.
The Photoshop brushes folder is already part of your computer’s system; it was downloaded along with the program itself. Go to your program files menu and find Photoshop, then look for the brushes folder. Look under presets and support files – the path is slightly different depending on your operating system and the Photoshop version you are using, but you should be able to find it one of these two ways.
Once you have found the brushes folder, open it and paste your brush file right in.
Using the preset manager
If you want to do it a different way, you can also use the preset manager tool in Photoshop. First, click your brush tool so your brush toolbar will appear or click on edit in the top menu bar, scroll down to presets, and wait for the options menu to appear.
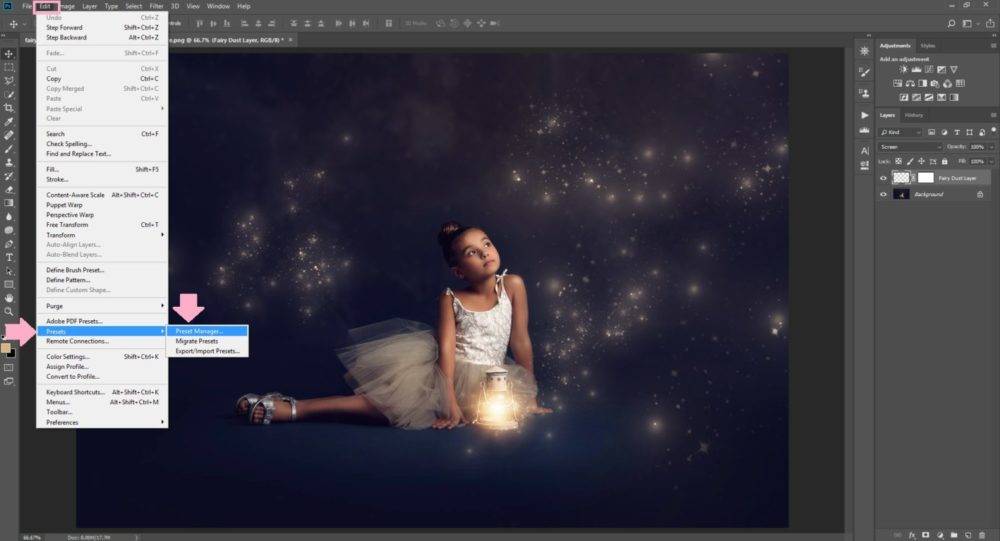
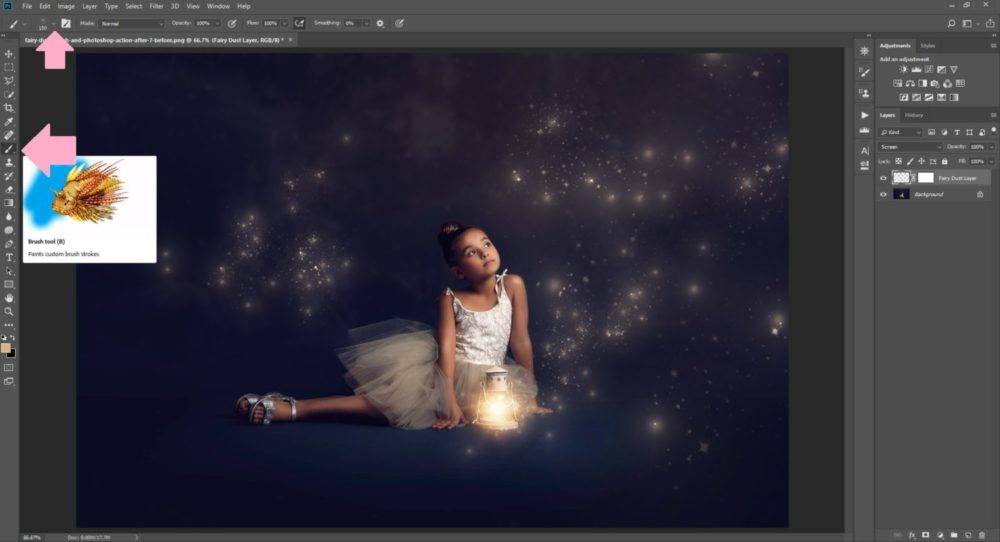
Image is courtesy of Lindsey Lee Photography
This is where you will see the presets manager. Once you have clicked on the name and the pop-up box has appeared, you will see all of your current brushes appearing in a grid. To the side, you will find the option ‘load’.
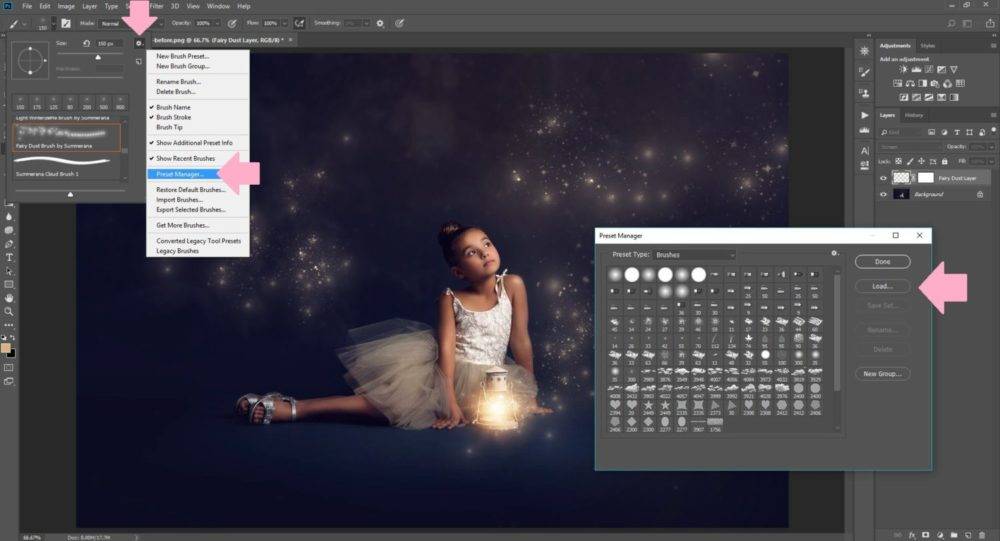
Image is courtesy of Lindsey Lee Photography
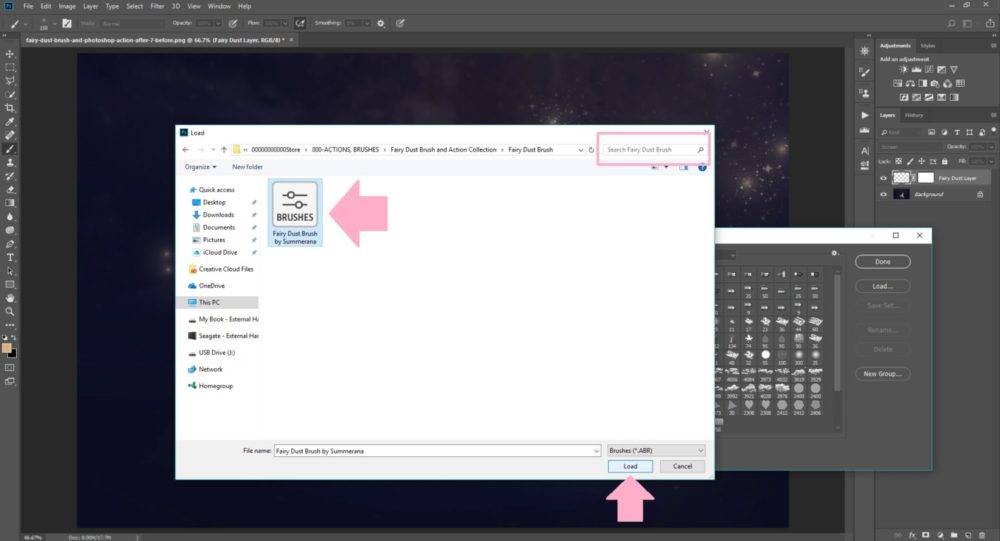
Click on load, navigate to your new brush, and select it. This will load it into Photoshop ready for you to use. Note that this method does not require you to move or make a copy of your original brush file, which makes the filing process we described above all the more important.
Using your brushes
Now, if you have Photoshop open already, you will need to close it down and restart it before you can see the relevant brush file popping up in your brushes menu. Do that first, or simply start Photoshop if it was previously closed. This only applies if you used our first method; the preset manager will load the new brush in live.
When you open up Photoshop, click on the brush tool from the left-hand side toolbar and you will see your options appear along the top bar. One of them looks like a picture of your brush, with a little arrow at the side. Click on this, and you can choose your brush from all of the options there.
You might find it hard to recognize your brush at first because the shape might not be what you were expecting. This is one of those quirks of Photoshop; you will soon recognize which is which, and if you aren’t sure, you can simply select one and try it. You can also hover over the brush and the name of the brush will show after a few seconds if it doesn’t already show the name underneath the brush. If you have made a mistake, you can undo anything you drew with the brush and choose another one instead.
Remember to play around with your brush using the opacity, flow, size, and mode options in the top bar menu too. This can really change the effect of your brush. Also remember that you can do either one single click of a brush, or drag it around the image to lay down lots of the pattern. This may be important depending on the type of brush you are using.
You can also use the brush panel on the right-hand side of your screen to make some even more advanced adjustments (if you don’t see the brush settings option, select Window > Brush Settings.
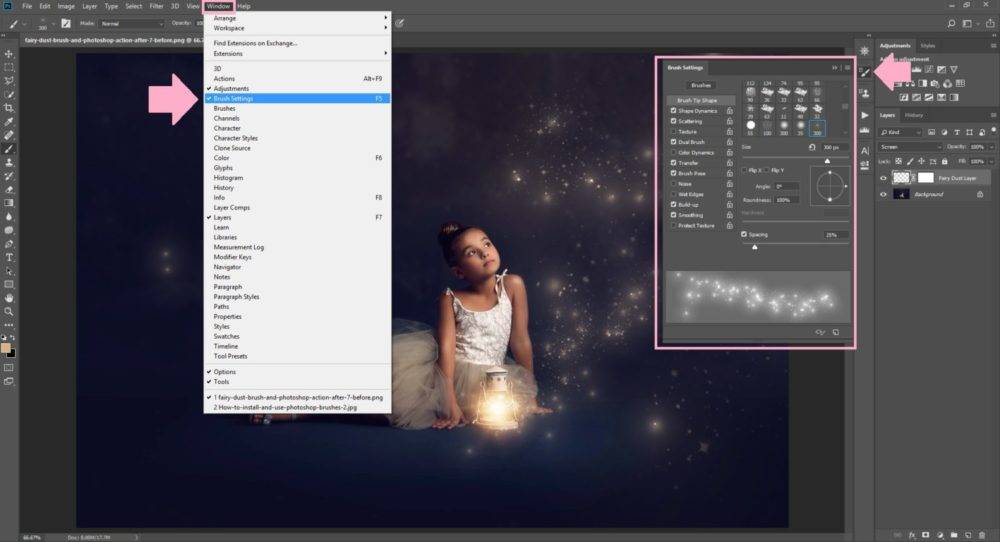
Image is courtesy of Lindsey Lee Photography
Like any advanced feature of Photoshop, practice will really help you to understand what each option does and how to use them!
You can watch Grace Pamela show you how to do all these steps in her video tutorial here:
Now you have your brushes installed and ready to go, feel free to go wild. There are lots of applications for even the most simple brush, so imagine what you can do with something a bit more special!
What’s your favorite brush ever? Let us know in the comments!
Pingback: How to Unzip your Photoshop and Lightroom Files - Summerana - Photoshop Actions for Photographers