
Photoshop actions are incredibly useful tools for photographers. They can help you to create effects you would never manage on your own, turn complex processes into a single click, and save you a lot of time and effort. We are going to show you how to install and use photoshop actions.
Once you have downloaded and unzipped your actions, however, what do you do next? This guide will help you to understand, and with our helpful video tutorial, you’ll be an actions pro in no time at all.
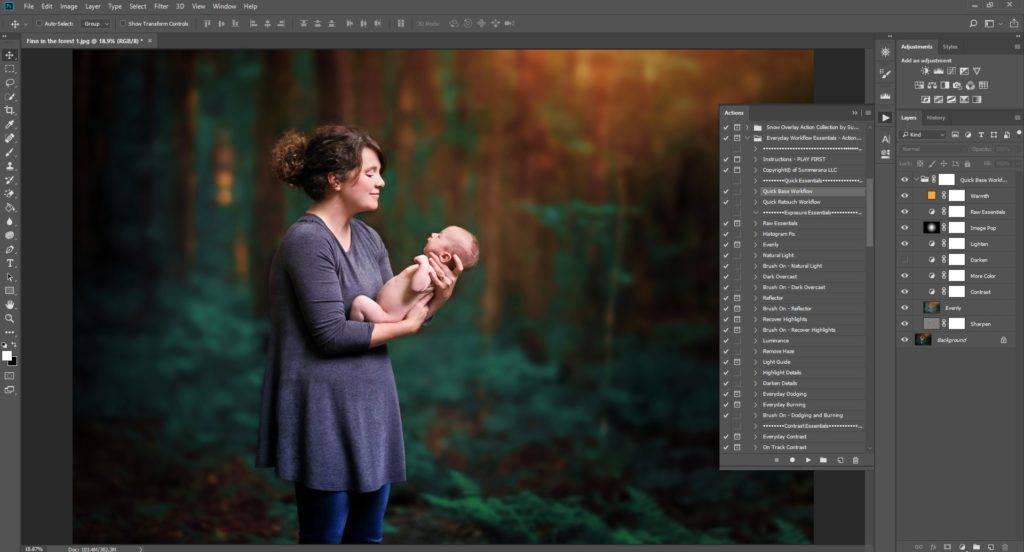
Image is courtesy of Summerana Photography
Installing your Photoshop actions
The first thing that you will want to do is figure out how to get those new actions from your computer and into Photoshop. You might expect that they would be there as soon as you open the program after downloading them, but Photoshop needs a bit of help to find them first.
First off, open Photoshop and see if you can find your actions panel. This is where all of your actions are stored and where you can access them from if you want to use them. If you don’t see it, don’t worry – you can find it again easily.
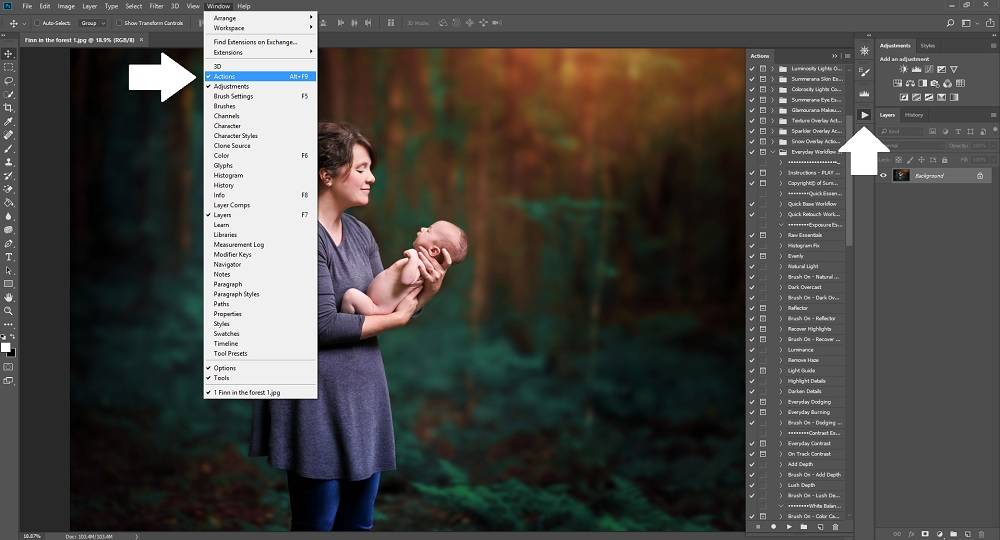
Head to the ‘window’ option on the main menu bar and look for the ‘actions’ listing. If there is no tick next to it, click on it and it should open up in your panel area. If it is already ticked, that just means you didn’t spot it yet.
When the actions panel is activated but not open, it will appear as a play button icon in the tray to the right side of your screen. You can click on this icon and move it around if you want to – for example, try dragging it over next to your layers and placing it there for easy access. If you’re happy with where it is, just click on the icon and it will open up. There you will see all of your existing actions. If you haven’t created or installed any yet, you should see the default actions which are built into Photoshop.
Now you’re in the right place, it’s time to install your actions. Use the dropdown button at the top of the actions panel. When it opens up, you will see a whole list of options. Click on the one that says ‘Load actions’.
The program will now open up a file folder which is usually set to the last folder you imported something from. You can save some time by moving all of your downloaded actions into the same folder. Even if you keep them separated into individual folders within that folder, you’ll still find it easier to get to them every time you need to.
Navigate to your new action folder and find the file. If you are having trouble finding it, you can use the search bar to check for any files with the ending .atn – this ending means that it is an action file, so it will only bring back actions as results.
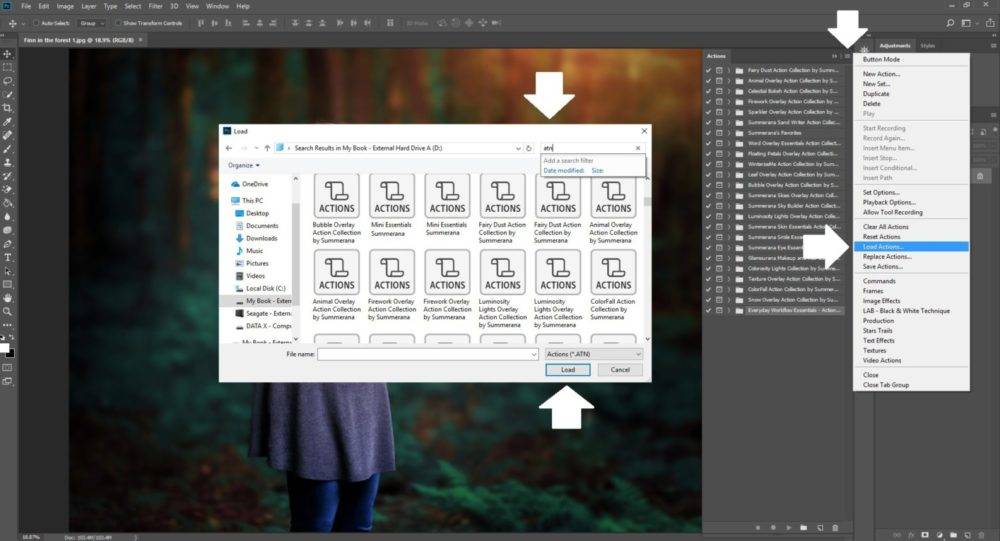
Once you have selected the right action file, click on the load button at the bottom of the file dialogue. This will import the action into and install it automatically.
Here is a video tutorial to show how to install and use Photoshop actions by Grace Pamela the founder of Summerana.
Organizing your actions and safekeeping
Next up, you will want to organize your actions within Photoshop, especially if you have a lot of them. You can actually click on the name of any action in your list and drag it to move it around, putting it above or below others.
You can also create folders within your action panel, by right-clicking or selecting that option from the dropdown menu. You can open and close actions and action folders, so you can see as much or as little as you want when you are using them.
This will help you to find what you are looking for when you need it. Feel free to move, rename, and reorganize your actions as much as you want. They should be set up in a way that is easy for you personally to use, as that is all that matters!
Be sure that you have your actions backed up – both on your computer and on an external hard drive if possible. Don’t be tempted to delete your action files as you won’t be able to get them back if this happens! Even though they are loaded into Photoshop, something could happen which removes them from your system. It’s easy to put them back in, but only if you still have those files.
Plus, once you have them saved, you can reload them whenever you change computers or reinstall Photoshop.
Using your actions
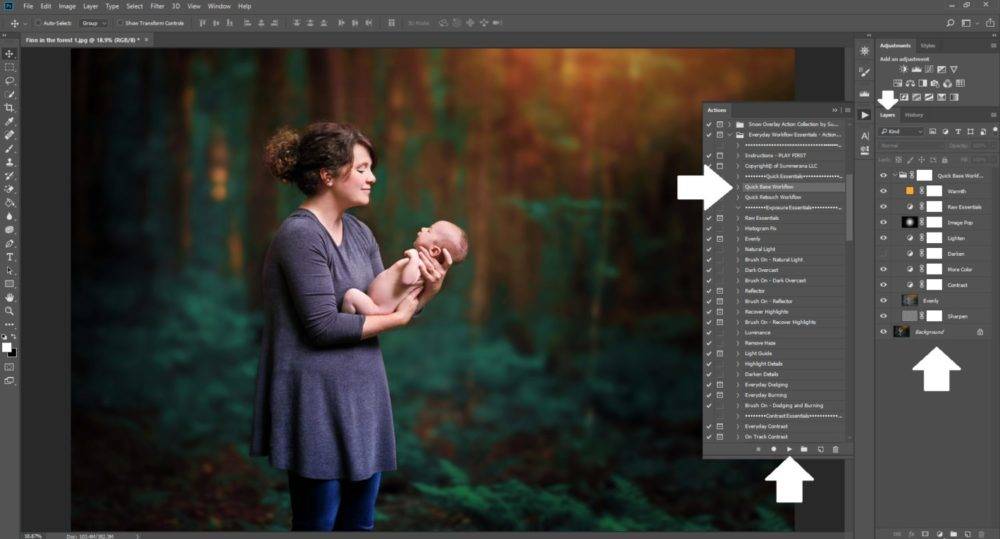
Using your actions is really easy. All you have to do is open an image file, and then select the action you want to use. At the bottom of the actions panel there is a play button – just press this and it will apply the actions for you. Your effects will show up in your layers panel (if you do not see your layers panel, do the same step you did to open your actions panel but select ‘layers’ instead).
You can also work on a larger selection of images all at the same time with the batch processing tool. Just go to the main file menu, and click on ‘Automate’. This will open up a sub-menu which includes the option ‘Batch’.
After opening up the batch processing window, you can choose a number of options. First, decide on which action you want to use, and then whether the files you want are already open in Photoshop or need to be taken from a particular folder. Finally, you can choose to save and close the files or leave them open for further edits.
There are a lot of other options to explore, so check these out and try them for yourself when you need them.
Please enjoy these free Photoshop actions and overlays from us! Click here to download or simply click the image below to be taken to our free photography resources page.

Hi, I purchased your bundle quite some time ago, I have photoshop elements 12. I couldn’t download it properly and then it expired. I saw your free offers and thought I would try again. I the Leaf Overlay I am able to figure out how to get everything except the actual “Leaf” overlay to place. I have watched the video numerous times and re-downloaded the freebies and tried again without getting it right. Do the leaves go under “Effects”? As you can tell I am not a computer genius. Any help would be greatly appreciated. I would also like to thank you for the “Freebies” you have been so generous with! Your truly, Marianne Wall
Hi, I purchased your bundle quite some time ago, I have photoshop elements 12. I couldn’t install it properly and then it expired. I saw your free offers and thought I would try again. The Leaf Overlay I am able to figure out how to get part of the download, everything except the actual “Leaf” overlays, I am unable to see the leaves. I have watched the video numerous times and re-downloaded the freebies and tried again without getting it right. Do the leaves go under “Effects”? As you can tell I am not a computer genius. Any help would be greatly appreciated. I would also like to thank you for the “Freebies” you have been so generous with! Your truly, Marianne Wall
Pingback: How to Install and Use Overlays in Photoshop - Summerana - Photoshop Actions for Photographers
Pingback: How to Unzip your Photoshop and Lightroom Files - Summerana - Photoshop Actions for Photographers
I downloaded the Confetti overlay for PSE and I’ve unzipped the file but I’m not seeing any overlays to choose from
Hi Tony
It sounds like you may have downloaded the action file and not the overlays <3 Can you send us an email [email protected] so we can help you further
Hi, I have downloaded presets for ACR but cannot see instructions of how to load them into the program. On searching my program files there isn’t one for ACR like there is for PS & Lightroom. Could you please help
Thank you
Nina
Hello Nina
We have this tutorial that will show you how to install the ACR presets: https://www.youtube.com/watch?v=d2Pqy27oHhY&t=87s
If you have any questions, please email us at [email protected] and we will be happy to help